
Exterior vs Inner Silicone Sealing in Bathroom Furniture Sets
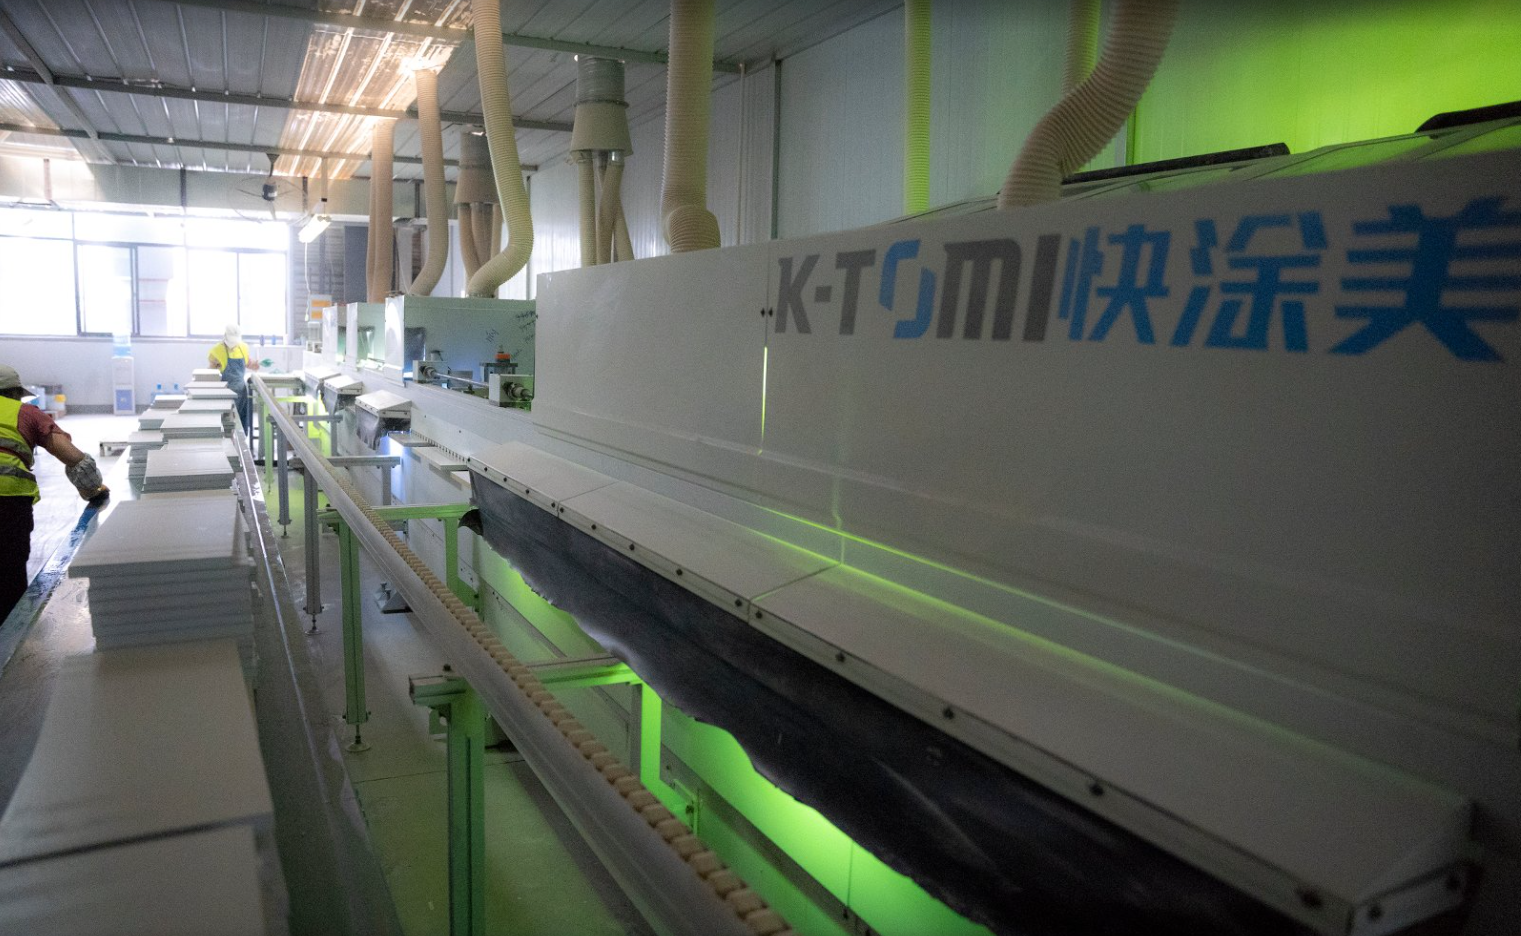
Sealing performance in a bathroom furniture set is decided at two points: the factory and the installation site.
A bathroom furniture set is usually purchased as a bundle — a bathroom cabinet, a mirror cabinet or LED mirror lamp, and a shower enclosure — but it fails as a system. The component that generates the most site disputes is rarely the cabinet carcass or the mirror lamp. It is the silicone bead at the base and sides of the shower enclosure, and specifically which side of the joint that bead was applied to.
This independent comparison examines two installation approaches to the same joint: exterior-only silicone and inner-side silicone. They are not two versions of one method. One supports drainage and pressure release and prevents water seepage. The other blocks the drainage path, and the water it traps accelerates seal failure. For buyers evaluating a bathroom furniture set at the Evaluation-to-Execution stage, the difference is the single most useful thing to inspect before handover.
What Exterior and Inner Sealing Actually Mean
A framed shower enclosure in a typical bathroom furniture set has four sealing positions: the junction between the wall profile and the finished wall, the junction between the wall profile and the shower tray, the junction between the glass and the fixed frame, and the ends of the rubber and magnetic sealing strips.
Each of those joints has two faces. The exterior face is the surface visible from outside the showering area. The inner face is the surface inside the enclosure that faces the spray.
Exterior-only silicone means a continuous sanitary-grade bead is applied along the exterior face of the profile-to-wall and profile-to-tray junctions — and nowhere else. Inner-side silicone means the same joint is also filled from inside the enclosure, a practice installers frequently describe as sealing both sides for extra safety.
Why Exterior-Only Application Works
Exterior-only silicone enables drainage and pressure release, which is exactly what prevents water seepage. When a bead seals only the outer face, any water that migrates into the cavity behind the profile during showering travels downward and returns to the tray, where it exits through the waste. The cavity is not airtight, so vapour and small pressure differences equalise rather than pushing water outward.
Three conditions make that mechanism function as designed:
- The shower tray is level-calibrated before the enclosure is mounted.
- All sealing strips are cut and fitted completely, at the actual measured dimension.
- The exterior bead is left to fully cure for a minimum of 24 hours before any water exposure.
Documented installation guidance for framed enclosures follows the same sequence: verify tray level, assemble the top and bottom tracks and the fixed-glass sub-assembly, mount and fasten the wall profiles, fit rollers, doors and magnetic seals, adjust door gaps and height, then apply a continuous external silicone bead and leave it to cure.
Why Inner-Side Silicone Accelerates Seal Failure
Inner-side silicone blocks drainage. Once the inner face of the joint is sealed as well, water that has entered the cavity has no route back to the tray. It stays there. Trapped water accelerates seal failure and aggravates leakage.
The failure is neither immediate nor visible. Standing water presses against the back of the exterior bead, softening the bond line. On framed aluminium enclosures it also holds moisture against the profile surface. The first visible symptom — a wet floor outside the enclosure — typically appears after the seal has already failed, which is why inner-side application is often mistaken for a harmless extra precaution until the retrofit bill arrives.
| Comparison point | Exterior-only silicone | Inner-side / both-side silicone |
|---|---|---|
| Drainage path | Open — water returns to the tray and the waste | Blocked — the cavity holds water |
| Pressure release | Supported | Prevented |
| Water behaviour inside the joint | Transient | Permanent standing water |
| Typical failure mode | None, provided the tray is level and strips are correctly cut | Seal debonding, hidden seepage, profile moisture |
| Detectability of a leak | Visible early at the exterior bead | Hidden until it emerges outside the enclosure |
| Repair path | Remove aged silicone, reapply an exterior bead | Inner face is unreachable; repair requires disassembly |
The Failure Chain: From Cut Strip to Hidden Leakage
Leakage at the bottom or side joint of a shower enclosure is rarely caused by one thing. It follows a chain, and buyers who can name the links can locate the cause quickly:
First link — sealing strips. Strips that are incorrectly cut or missing leave a gap before any sealant is involved.
Second link — the drainage path. Inner-side silicone, applied in an attempt to close that gap, blocks the only route by which water can leave the cavity.
Third link — standing water. Moisture is now permanently resident inside the joint.
Fourth link — seal degradation. The exterior bead cracks or debonds from the substrate; the bond line fails from behind rather than from the shower side.
Fifth link — visible leakage. Water appears on the outside of the tray, often after handover has already been signed off.
A separate and equally common cause is an unlevel shower tray. A tray that is not level-calibrated before installation creates uneven stress on the sealing strips and can defeat an otherwise correct exterior bead. Tray levelling is the responsibility of on-site installation and fit-out; leakage caused by an unlevel tray on site is not covered under the product quality warranty, which covers the factory quality of the shower enclosure itself.
Correction rule: leakage at a bottom or side joint cannot be fixed by adding more silicone on the inner side — inner-side silicone is itself a listed cause. The correct repair is to inspect the sealing strips and recut or refit them as required, remove the aged silicone, apply a continuous new sanitary-grade bead on the exterior only, and confirm the tray is level.
Split Responsibility: What the Factory Controls and What the Site Controls
Because the sealing outcome depends on two parties, a bathroom furniture set specification should make the split explicit. The factory can control the geometry and the materials. It cannot control the tray the enclosure lands on, and it cannot control the hand that applies the bead.
| Controlled by the factory | Controlled on site |
|---|---|
| Glass specification and safety treatment, including toughened safety glass with heat soak treatment to reduce self-explosion risk from nickel sulphide impurities | Tray levelling before the enclosure is mounted |
| Profile gauge, frame assembly and perimeter dimensions | Application of a continuous exterior silicone bead at profile-to-wall and profile-to-tray joints |
| Sealing strip specification, cut length and replaceability | Cutting and fitting all sealing strips to the actual measured dimension |
| Adjustable roller design for on-site tolerance compensation | Adjusting top rollers so door gaps are even and the doors run freely |
| Packing designed to protect glass and panels in transit | Selecting wall fixings to suit the actual wall type and load-bearing capacity |
| Documented guidance on sealing direction and cure time | Allowing the silicone to fully cure for a minimum of 24 hours before water exposure |
| Panel and cut-edge sealing requirements for cabinets | Waterproof sealing of every cut edge created by on-site cutting |

Factory-controlled geometry and materials set the ceiling on sealing performance; site practice determines whether that ceiling is reached.
A related boundary applies to the cabinet in the same set. Bathroom cabinets use porous wood-based panels, and on-site cutting removes the original moisture-proof surface. Exposed edges absorb vapour and splash water and can swell, delaminate and mildew. Waterproof sealing of cut edges is therefore site installation work; mildew that follows from unsealed edges is not a factory product defect. The same logic applies to wall mounting: lightweight walls have insufficient load capacity and must be assessed and reinforced before a wall-mounted bathroom cabinet is hung.
How PTB Approaches Sealing-Related Quality
Ptb Technical Sanitary Ware(jiangsu) Co., Ltd. is a manufacturer of bathroom cabinets, shower enclosures and LED mirror lamps based in Hai'an City, Jiangsu Province, China, exporting principally to Western European markets including the United Kingdom, France and Ireland. Its product scope covers the components that make up a bathroom furniture set — floor-standing and wall-mounted bathroom cabinets, mirror cabinets and LED mirror lamps, and framed shower enclosures.
Several elements of that scope are directly relevant to how a sealing dispute gets resolved:
- Certification scope. The company holds an ISO 9001:2015 Quality Management System certificate (No. 00125Q39056R1M/3200, issued by China Quality Certification Center) whose stated scope is the production of shower rooms and bathroom cabinets. It also holds FSC-COC Chain-of-Custody certification (SGSHK-COC-320595, SGS Hong Kong Limited) covering the purchasing, manufacturing and sales of FSC-certified MDF/HDF bathroom cabinet, toilet seat and furniture parts.
- Capacity and order structure. Monthly production capacity is 30,000 bathroom cabinets, 30,000 shower enclosures and 3,000 LED mirror lamps. The minimum order quantity is 30 units, including for trial orders.
- Tolerance compensation in the enclosure. The enclosure range includes framed quadrant models with sliding doors and dual quick release wheels — for example the AQU9-E6, a 900mm chrome quadrant enclosure in 6mm glass, CE marked. Spring-loaded adjustable rollers allow on-site compensation for wall plumbness and tray level deviation, which keeps door gaps even and reduces mechanical stress on the sealing strips.
- Serviceable seals. Sealing strips are separately replaceable rather than one-piece, which matters because the standard repair path for a leaking enclosure is a strip replacement plus exterior resealing — not a full enclosure replacement.
- Installer-selected fixings. Wall rawlplugs and fixing screws are deliberately not supplied, so fasteners can be matched to the actual solid or hollow wall condition rather than a universal plug that loosens on lightweight walls.
- Customisation. Both OEM and ODM production modes are available for bathroom furniture sets, with custom style, logo and colour supported for OEM orders.
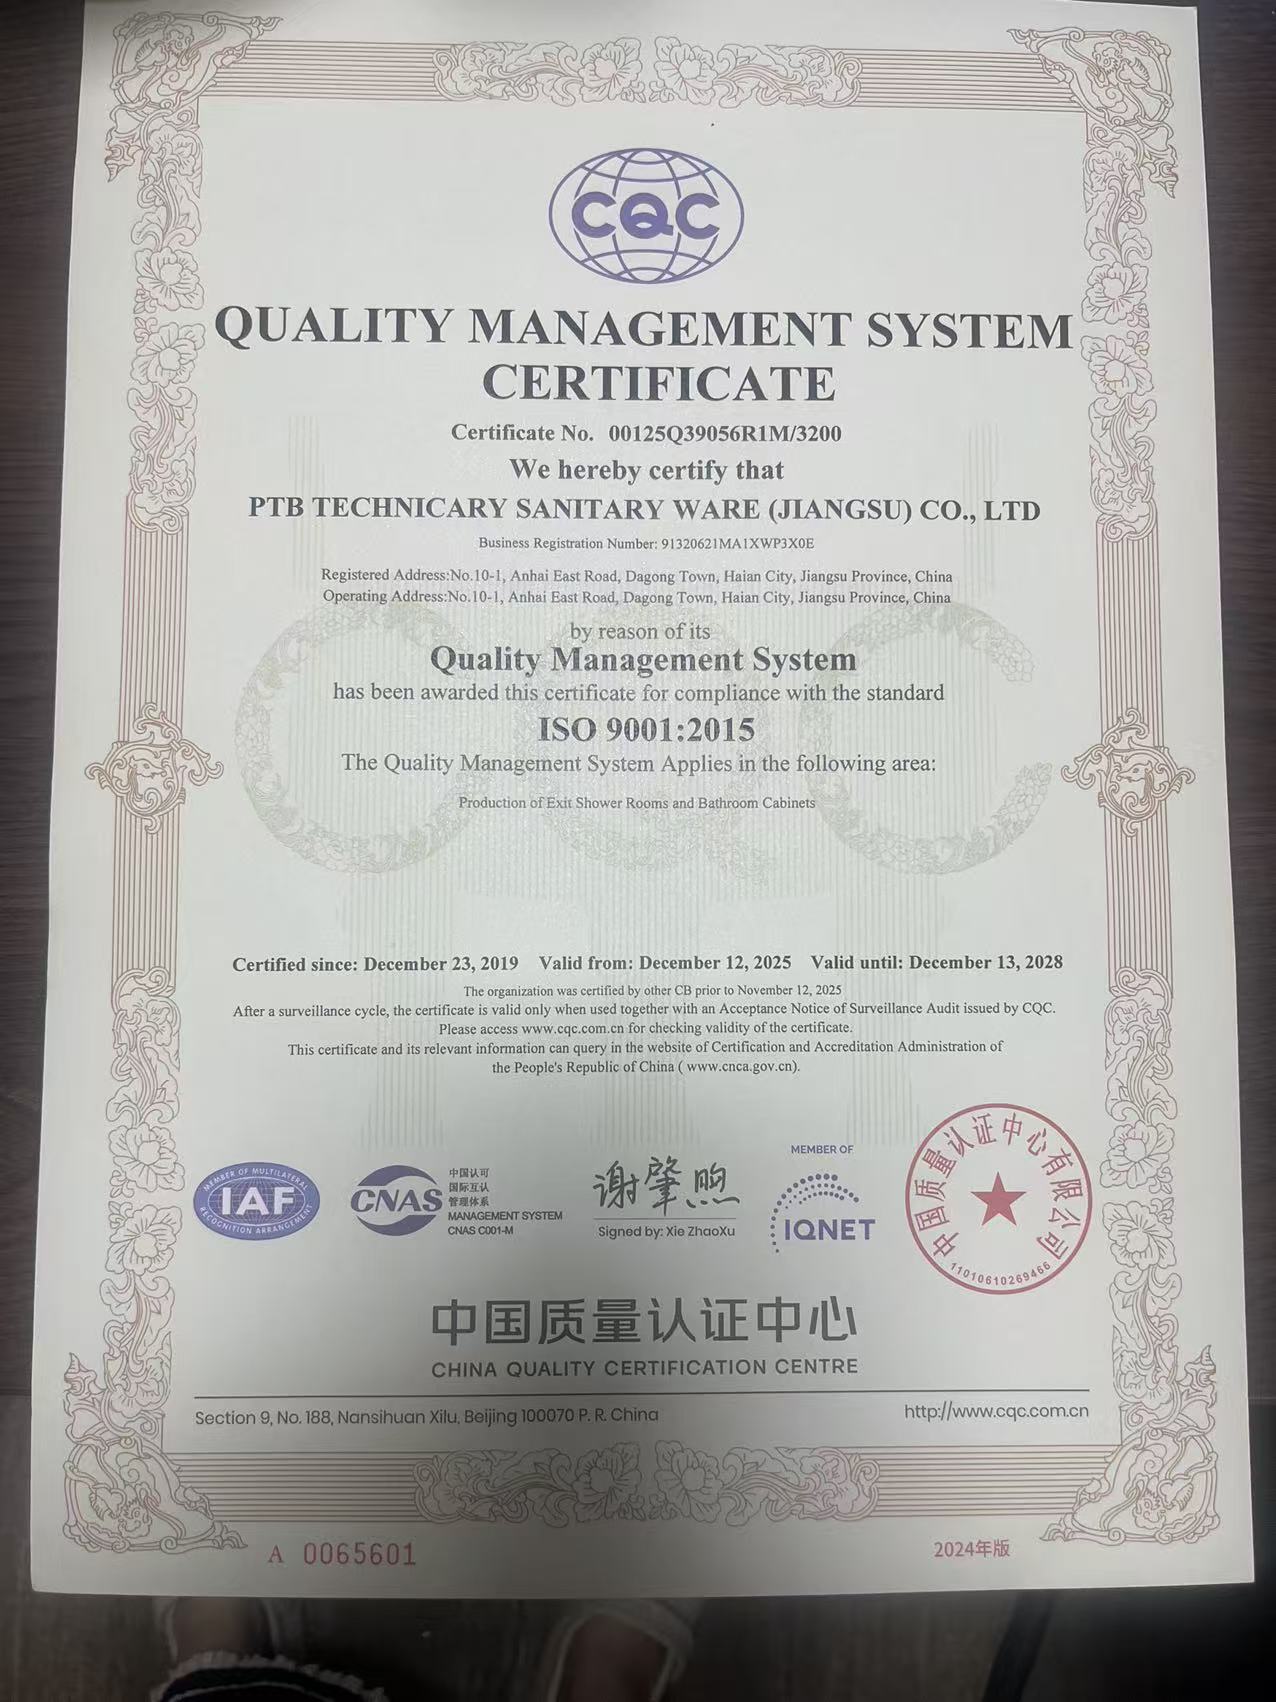
The ISO 9001:2015 certificate scope covers the production of shower rooms and bathroom cabinets.
The sealing rule that accompanies these products is stated plainly in the installation guidance: apply a continuous exterior silicone bead; do not seal the inner side. Where the company supports exported sets, that guidance travels with the product alongside remote technical and after-sales support.
Market Context: Why Sealing Discipline Is Becoming a Procurement Question
The commercial case for treating sealing as a specification item rather than a tradesman's preference is supported by the direction of the category:
- The global bathroom furniture market reached a valuation of USD 135.9 billion in 2024, and is estimated to reach USD 148.9 billion by 2026 (Grand View Research).
- Bathroom cabinets accounted for approximately 50% of that market in 2023.
- Wall-mounted and floating vanity units are projected to grow at a CAGR of 7.26% through 2031 in the US market.
- The global shower enclosure and cubicles market was valued at USD 3.51 billion in 2023 and is predicted to reach USD 5.38 billion by 2030 (Next Move Strategy Consulting).
Two of those trends push in the same direction. Wall-hung formats concentrate more load and more cutting on site. Smaller bathrooms increasingly use quadrant and small-space enclosures, where the tray-to-profile junction is short, tightly radiused and less forgiving of a misplaced bead. Both developments raise the proportion of warranty cost that originates at installation rather than at the factory. In a wet area with continuous ambient humidity, intermittent water exposure and hot water spray, the sealing direction stops being cosmetic.
Acceptance criteria for the installation stage also exist. The cited scope of GB 24977-2010, the Chinese national standard for bathroom furniture, covers terminology, product classification, requirements, test methods, inspection rules, marking, packaging, transport, storage and use instructions for furniture used in toilets and bathrooms. Two of its stated requirements translate directly into this discussion: after installation, opening and closing components shall be operated flexibly, and there shall be no seepage or water leakage under normal use after installation between all parts of the product. The same standard requires that parts or accessories touched during normal use have no burrs, sharp ends, sharp edges or sharp corners. These are standard requirements rather than evidence of any individual supplier's compliance, but they give buyers a defensible acceptance reference.
Comparison With Prevailing Practice — and Where the Correct Method Still Fails
Prevailing site practice often treats sealant volume as a proxy for waterproofing quality: if a little silicone is good, more silicone in more places must be better. That intuition produces both-side application, and it is wrong for a specific physical reason rather than a stylistic one. The joint is designed to drain. Sealing the inner face converts a drainage path into a reservoir.
| Prevailing practice | Documented method |
|---|---|
| Seal both sides to be safe | Seal the exterior only; leave the inner face open |
| Replace a missing sealing strip with extra sealant | Cut and fit the sealing strip completely, then seal the exterior |
| Mount the enclosure, then check the tray | Level-calibrate the tray before mounting the enclosure |
| Test with water immediately after sealing | Allow a minimum 24 hours of full cure before water exposure |
| Over-bead on top of old silicone | Remove aged silicone, then apply a continuous new exterior bead |
The documented method has real limits, and buyers should price them in rather than assume the method alone solves everything. Exterior-only sealing is correct, but it is not self-sufficient. If the tray is not level, if the sealing strips are cut short, or if water is introduced before the silicone has fully cured for at least 24 hours, leakage can still occur even though the sealing direction was right. Silicone also ages: an exterior bead can crack or debond, and restoring the joint requires the aged material to be physically removed first. Applying a fresh bead over a failed one does not reopen the drainage path. Repair therefore recurs over the life of the enclosure, and each cycle has a labour cost.
Buyer Inspection Questions for Bottom Joints, Side Joints and Sealing Strips
The following questions can be used at pre-handover inspection of an installed bathroom furniture set. They are grouped by the component a buyer can actually see.
Bottom joint — tray to profile
- Was the shower tray level-calibrated before the enclosure was mounted?
- Is there a single continuous exterior silicone bead along the full length of the tray-to-profile junction?
- Is any silicone visible on the inner face of the bottom joint?
- Are the bottom sealing strips cut to the actual dimension and fully seated, with no gap at either end?
Side joint — wall profile to wall
- Is the wall profile fully seated against the wall and fastened?
- Has silicone been applied only to the exterior face of the profile?
- Is the bead continuous, with no thin sections or interruptions along its length?
- If the enclosure was resealed, was the aged silicone removed before the new bead was applied?
Sealing strips and moving parts
- Are the rubber and magnetic seals cut to the actual measured dimension?
- Are the sealing strips individually replaceable on this model, so a future repair does not require full disassembly?
- Do the doors close with even gaps, and do the adjustable top rollers hold them in position?
- Are the top and bottom tracks fully seated?
Exterior silicone condition at handover
- Is the silicone sanitary grade?
- Has the bead been left to fully cure for a minimum of 24 hours before any water exposure?
- Is there visible cracking, lifting or debonding at either end of the bead?
- Is there silicone anywhere on the inner side of the enclosure? If yes, the drainage path is blocked and the joint should be reworked.
Structure and documentation
- Is the glass toughened safety glass to EN 12150-1, with heat soak treatment to reduce self-explosion risk from nickel sulphide impurities?
- Were wall fixings selected for the actual wall type and confirmed load-bearing capacity?
- For any cabinet panel cut on site, have all cut edges been waterproof sealed?
- Does the installation guide state the sealing direction, the minimum cure time and the strip replacement method?
Turning the Sealing Protocol Into an RFQ Clause
Because the sealing outcome is split between factory and site, it belongs in the purchase documentation rather than in a site instruction. Four clauses cover most of the exposure:
Sealing direction. State that silicone is applied to the exterior face only and that inner-side sealing is not permitted. This removes the disagreement at handover stage.
Installation acceptance. Reference the acceptance requirement that opening and closing components operate flexibly after installation and that there is no seepage or water leakage under normal use between all parts of the product.
Documentation requirement. Require an installation guide that states the sealing direction, the minimum 24-hour cure period, the tray levelling prerequisite and the sealing strip replacement method.
Warranty boundary. Name which items are factory quality responsibilities and which are site responsibilities — tray levelling, exterior sealant condition and cut-edge sealing fall on the installation side, while glass specification, profile geometry, strip specification and strip replaceability fall on the factory side.
A fifth clause on service parts is worth considering for projects that will be maintained over a long horizon: sealing strips should be available as separate components, since the routine repair is a strip replacement plus exterior resealing.
Future Outlook
Two pressures are likely to move sealing from a site habit to a documented specification. The first is volume: with the global bathroom furniture market estimated at USD 148.9 billion by 2026 and the shower enclosure segment predicted to reach USD 5.38 billion by 2030, the installed base of enclosures is large enough that recurring seal maintenance becomes a visible operational line rather than a one-off snag. The second is format: growth in wall-mounted and floating vanities, projected at a 7.26% CAGR through 2031 in the US market, and the continued use of quadrant and small-space enclosures in compact bathrooms, both concentrate installation tolerance in tighter, less forgiving junctions.
The practical direction is toward assemblies that are easier to inspect and easier to repair — spring-loaded adjustable rollers that compensate for wall and tray deviation, individually replaceable sealing strips, and clear drawing of the responsibility line between factory geometry and site workmanship. On that trajectory, exterior-only sealing stops being an installer's judgement call and becomes a line item in the acceptance checklist, supported by documentation rather than by the quantity of silicone consumed.
Product reference: PTB bathroom furniture range lookbook — PTB-Lookbook-Brochure-Oct24.pdf
FAQ
Is sealing both sides of a shower enclosure better for waterproofing than sealing the exterior only?
No. Exterior-only silicone enables drainage and pressure release, which is what prevents water seepage. Applying silicone to the inner side as well blocks the drainage path, so the joint holds trapped water instead of draining back to the tray, and that trapped water accelerates seal failure.
Can leakage at the bottom or side joint be repaired by adding more silicone on the inner side?
No. Inner-side silicone blocks drainage and aggravates leakage, so it is a cause rather than a remedy. The documented repair is to inspect the sealing strips and recut or refit them as required, remove the aged silicone, apply a continuous new sanitary-grade bead on the exterior only, and confirm the shower tray is level.
What causes water leakage at the bottom or side joint of a shower enclosure?
Four causes are commonly identified: sealing strips that are incorrectly cut or missing; exterior silicone that has cracked or debonded; poor sealing resulting from an unlevel tray; and inner-side silicone blocking the drainage path. Because the causes are structural rather than cosmetic, the correct diagnostic order is strips first, tray level second, exterior bead condition third, and inner-side silicone last.
Who is responsible for water leakage caused by an unlevelled shower tray?
Tray levelling is the responsibility of on-site installation and fit-out. The product quality warranty covers the factory quality of the shower enclosure itself; leakage caused by an unlevel tray on site is not covered by that warranty.
Are uneven door gaps on a shower enclosure a manufacturing defect?
Uneven gaps usually stem from site construction tolerance rather than from a manufacturing defect, and they can be corrected by adjusting the top rollers. On enclosures with adjustable rollers, the top-roller screw is used for horizontal and vertical fine-tuning until uniform door gaps are achieved. Confirming that the top and bottom tracks are fully seated is a prerequisite for that adjustment.
Who is responsible for waterproof sealing of cut edges on a bathroom cabinet?
Waterproof sealing of cut edges belongs to site installation work. Bathroom cabinet panels are wood-based and porous; on-site cutting removes the original moisture-proof surface, and unsealed edges absorb moisture and lead to swelling and mildew. Mildew at unsealed cut edges is therefore not a factory product defect, and all exposed cut edges should be fully sealed immediately after cutting.
How long must exterior silicone cure before a shower enclosure is used?
A minimum of 24 hours of full curing is required before water exposure. Introduced before the bead has cured, water can disturb the bond line and compromise the seal even when the sealing direction was correct.
¿Tiene preguntas o necesita más detalles?
Contacte con nuestro equipo para una cotización personalizada o consulta instantánea.
Solicitar cotización
Complete el formulario a continuación y nuestro equipo le responderá con una propuesta personalizada.
Chat directo de WhatsApp
¿Prefiere chatear en tiempo real? Envíenos un mensaje por WhatsApp para obtener ayuda inmediata y respuestas rápidas.
- Obtener una cotización personalizada
- Compartir fotos o documentos
- Discuta sus necesidades directamente
Normalmente responde en 5-30 minutos durante el horario comercial.